Mike Filip
So here is a couple pictures & explanations of the project!
Initial prototyping and test prints
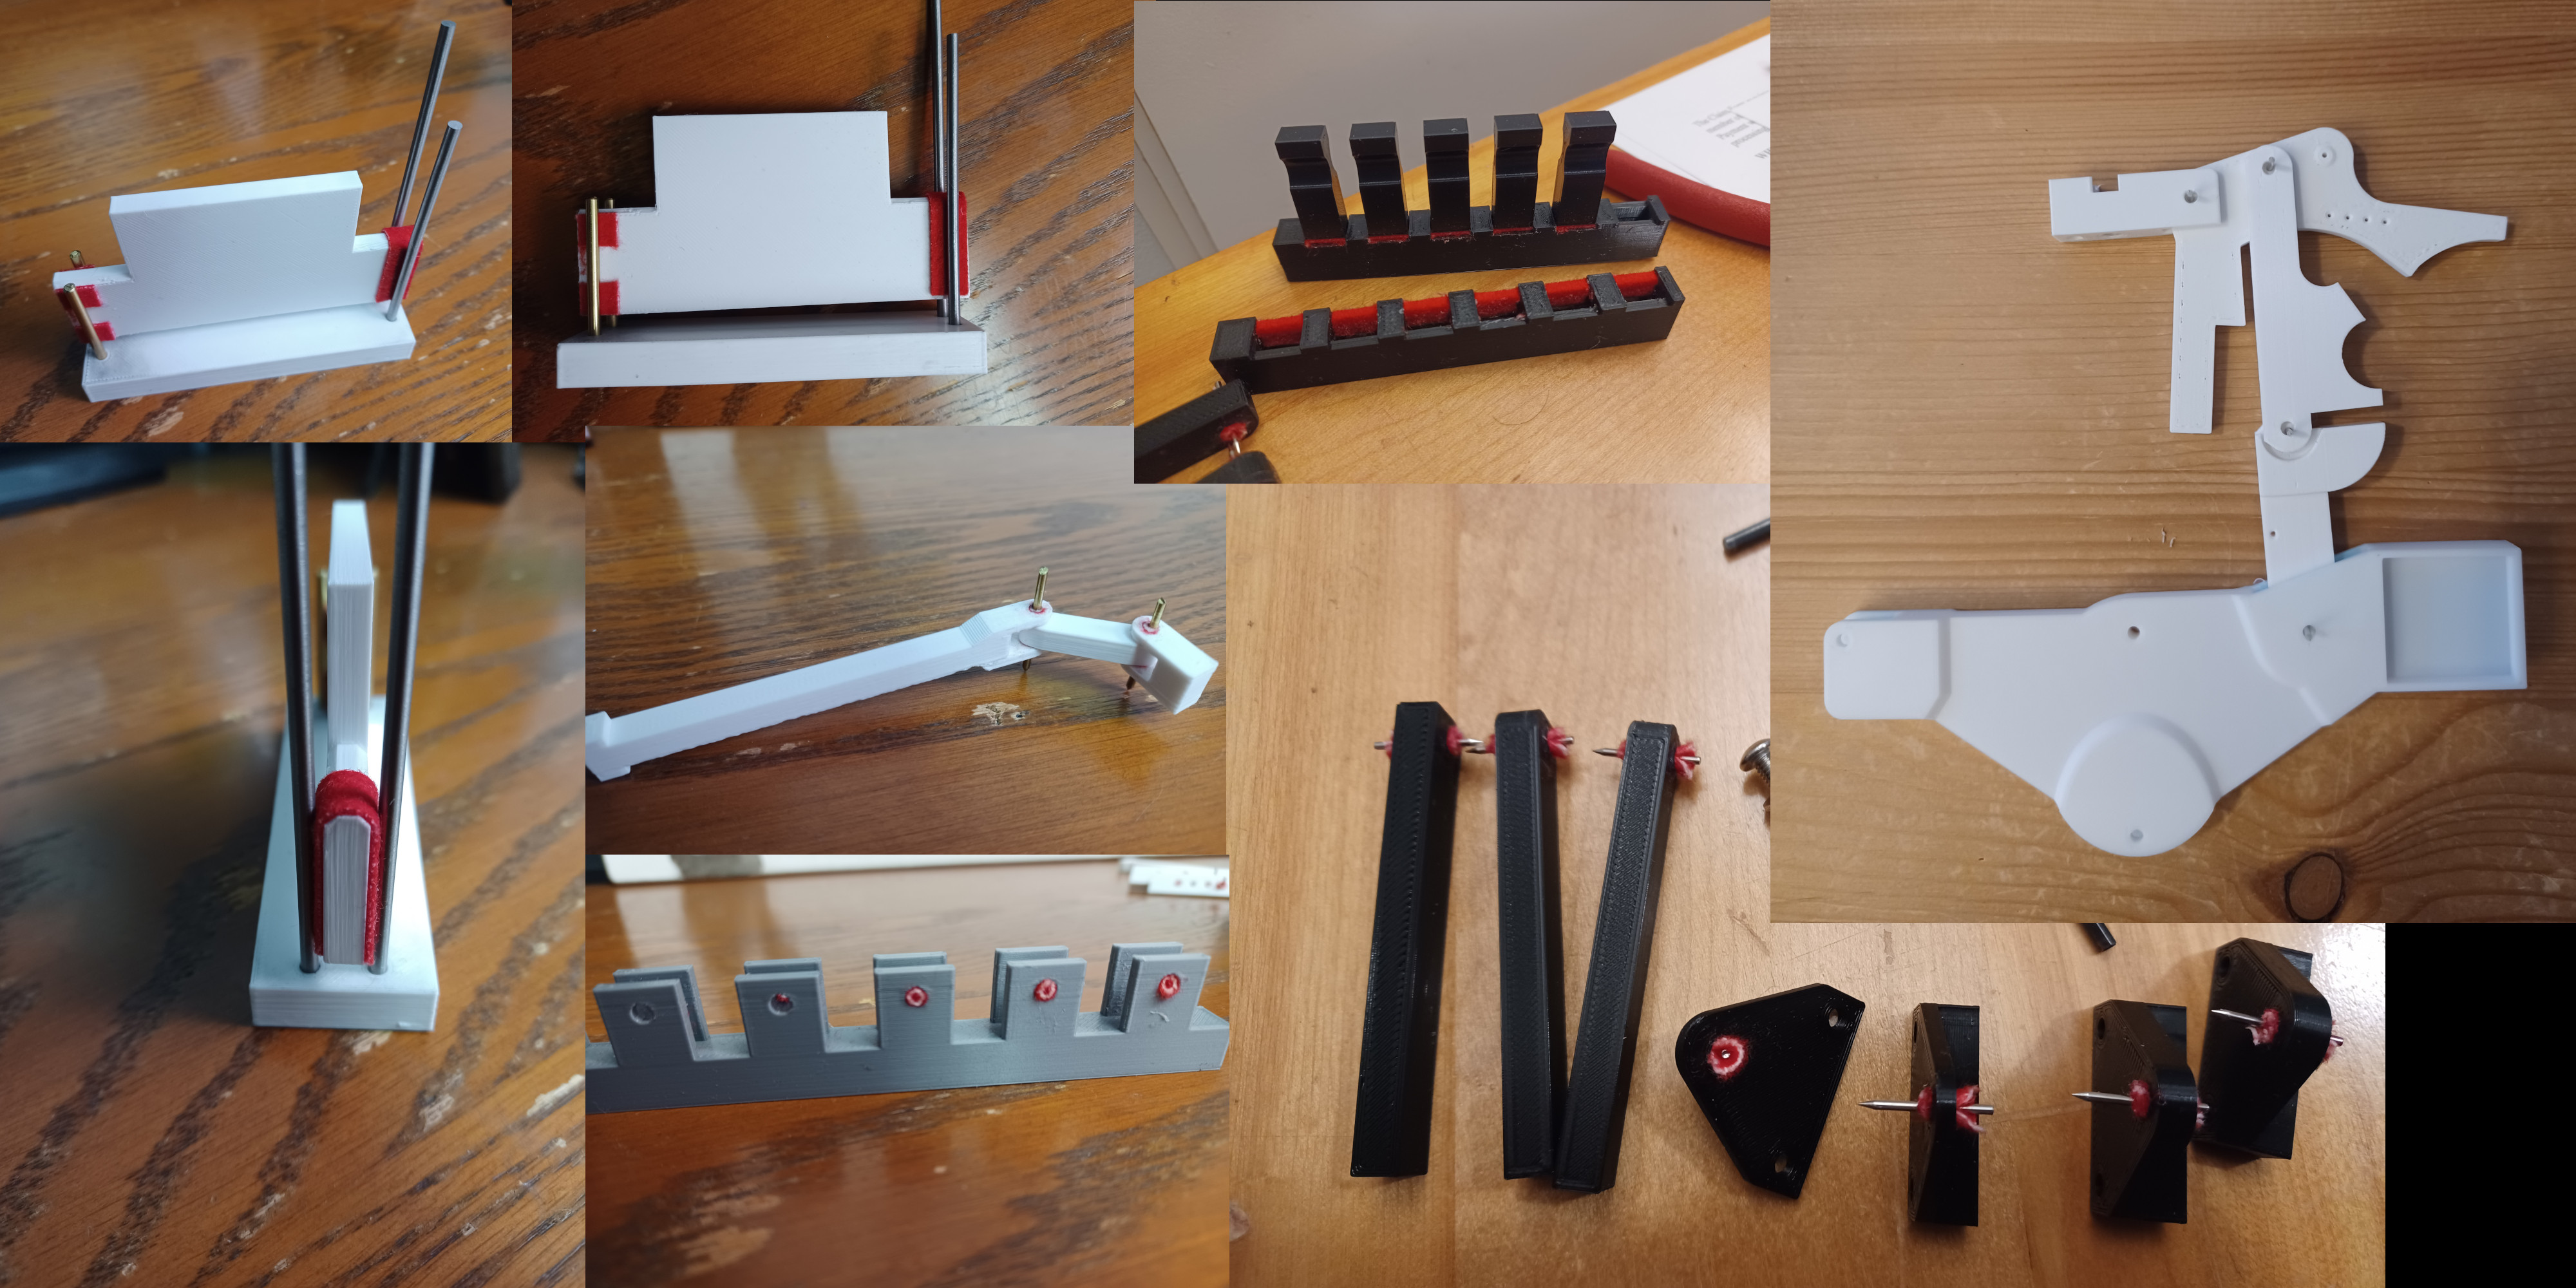
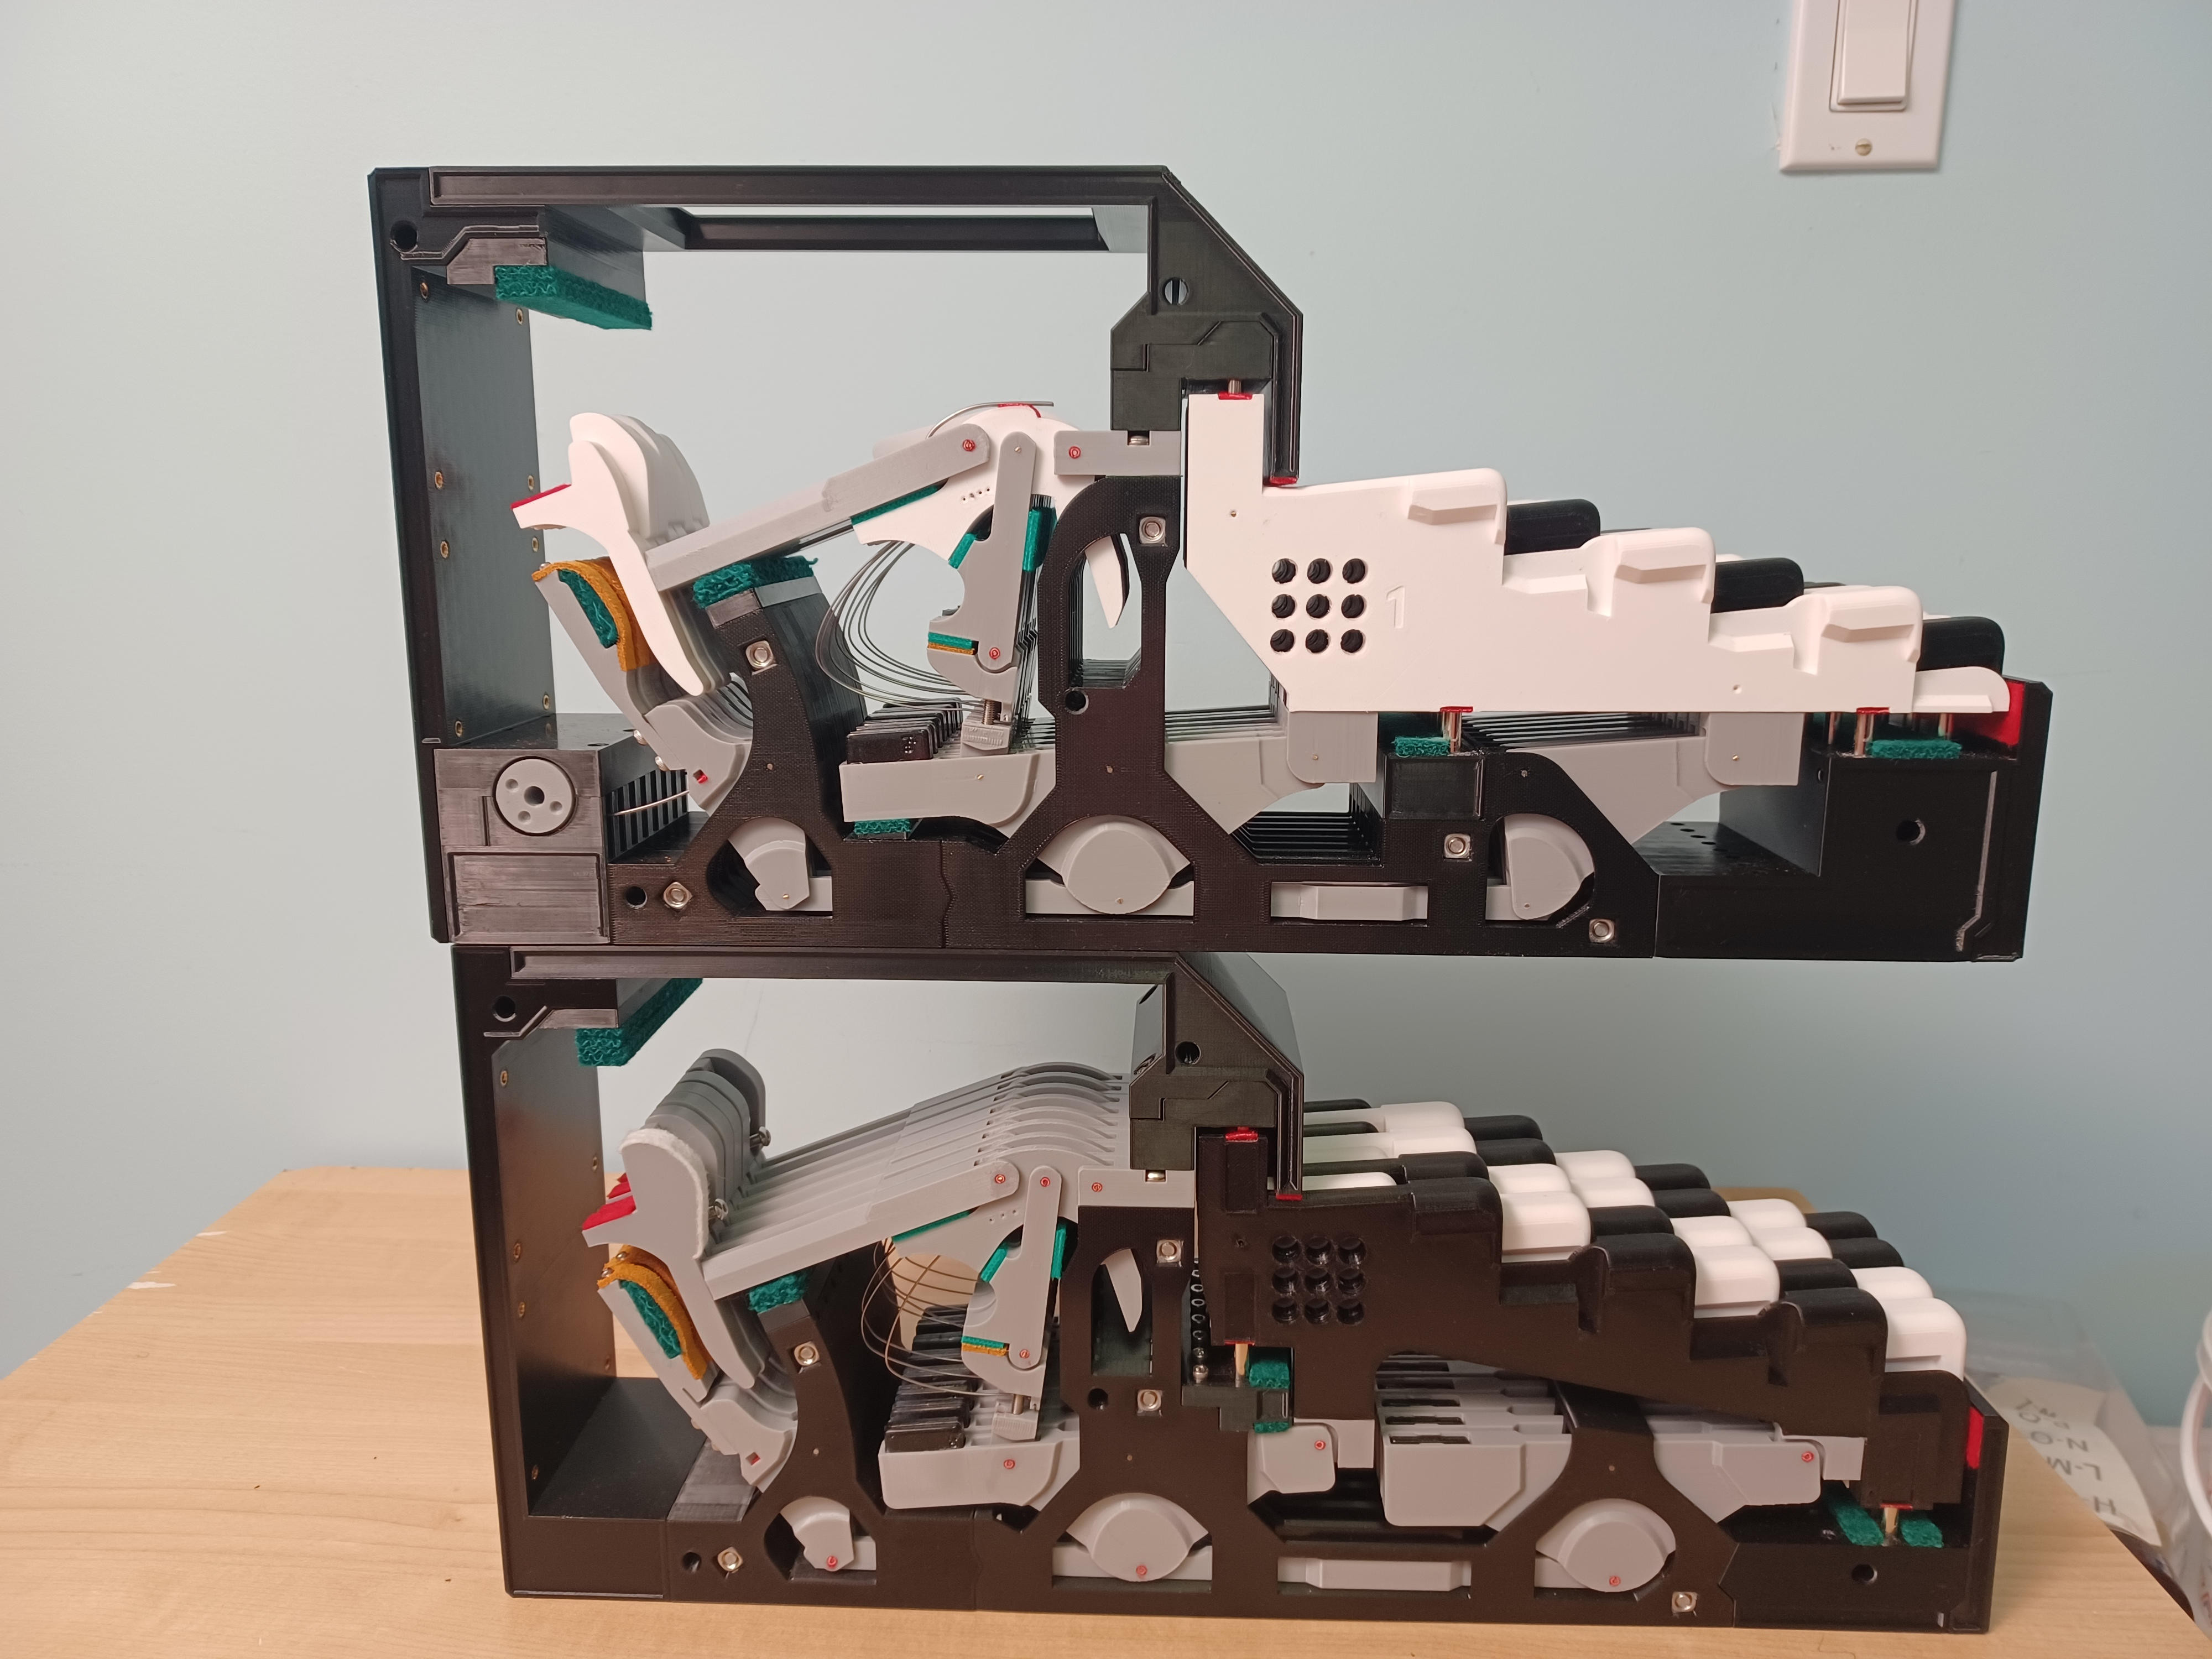
I started out thinking I could minimize costs by not using actual piano guidepins and center pins. This didnt last long as I realized that sanding and polishing a 3mm rod to spec was a huge pain, and not something I wanted to do a couple hundred times. So I ordered a bunch of guidepins and center pins via aliexpress and started working on the hickman action.
Framework
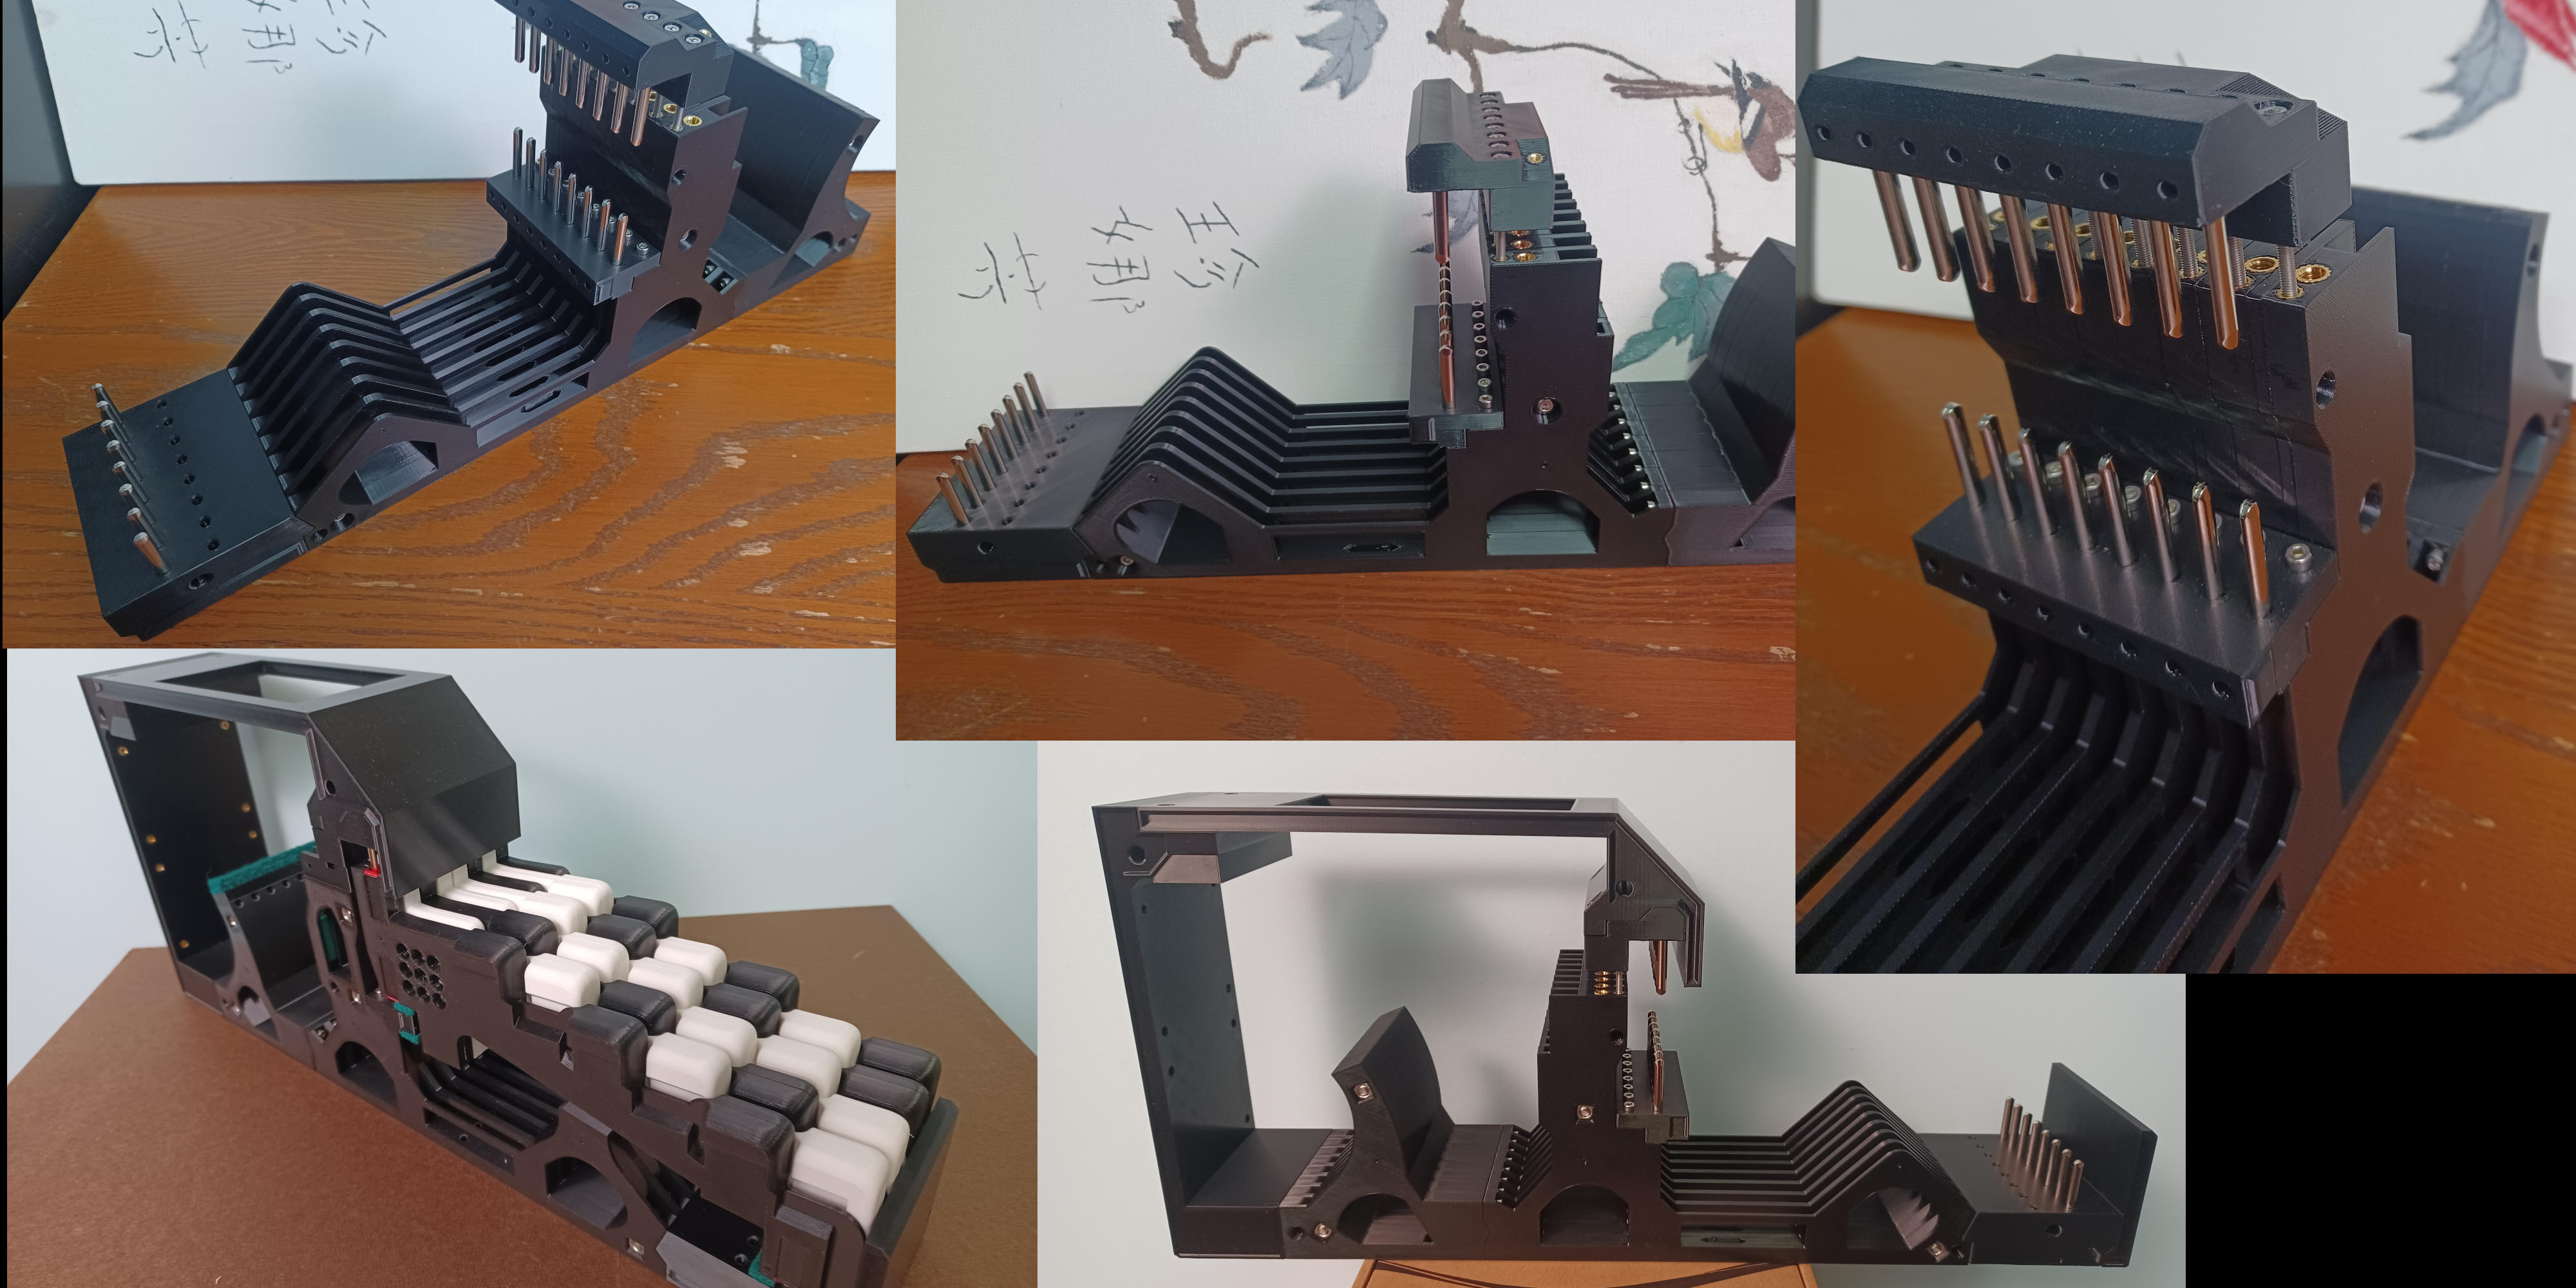
I got most of the action through the 'initial CAD drawing' phase within a couple months and started working on the framework, thinking it would be best to get that into 'printable' order before continuing. That plus the keys were a bit on the 'easy' side…
Key levers
This isnt really a part of a regular piano design, but part of the janko layout is the parallelogram structure that makes the keys dip down evenly no matter where you press on them - ensuring an even 9.5mm dip throughout the entire key. This theoretically makes playing the piano easier as you dont have to adjust the force of your playing based on if you are pressing at the front of the keys or along the back (and account for how different pianos have different key lever lengths)
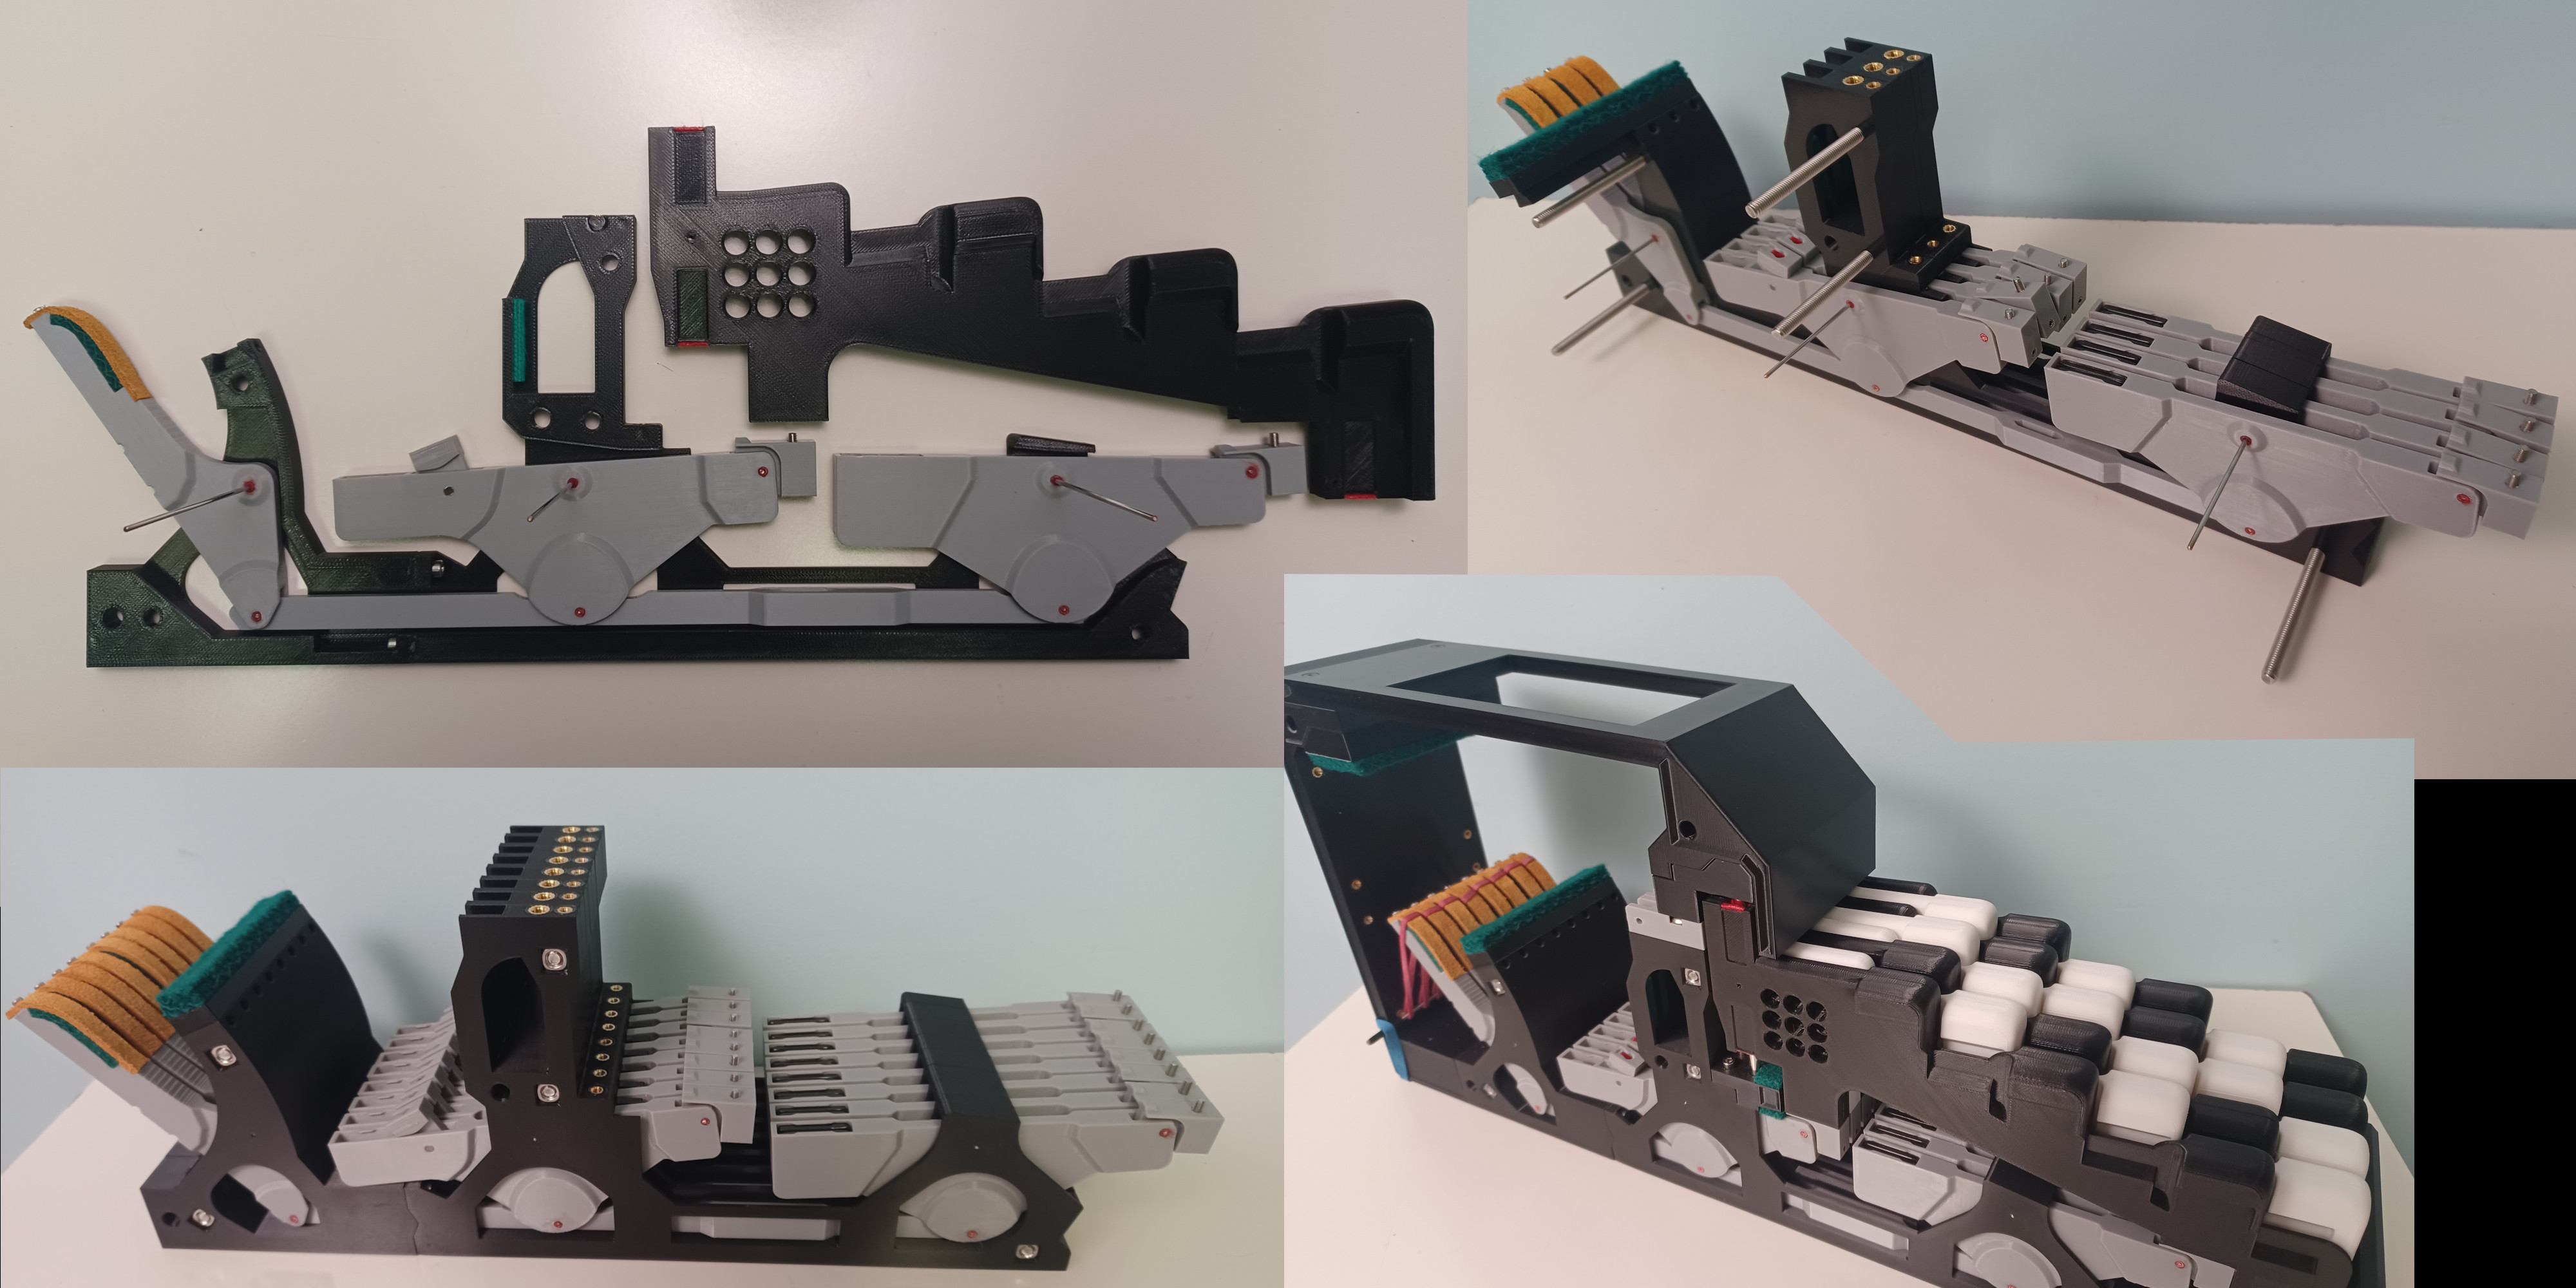
Hickman Action
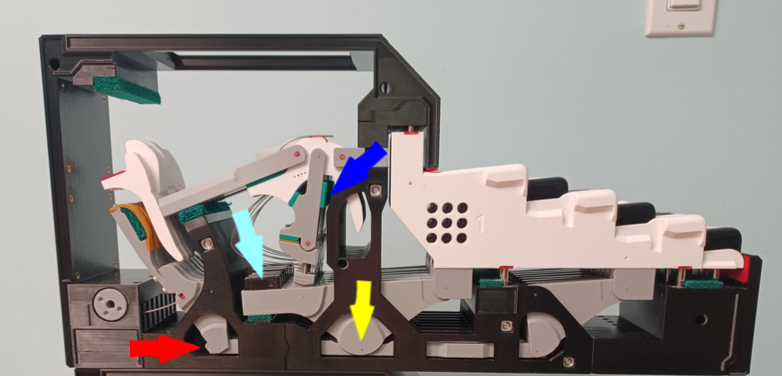
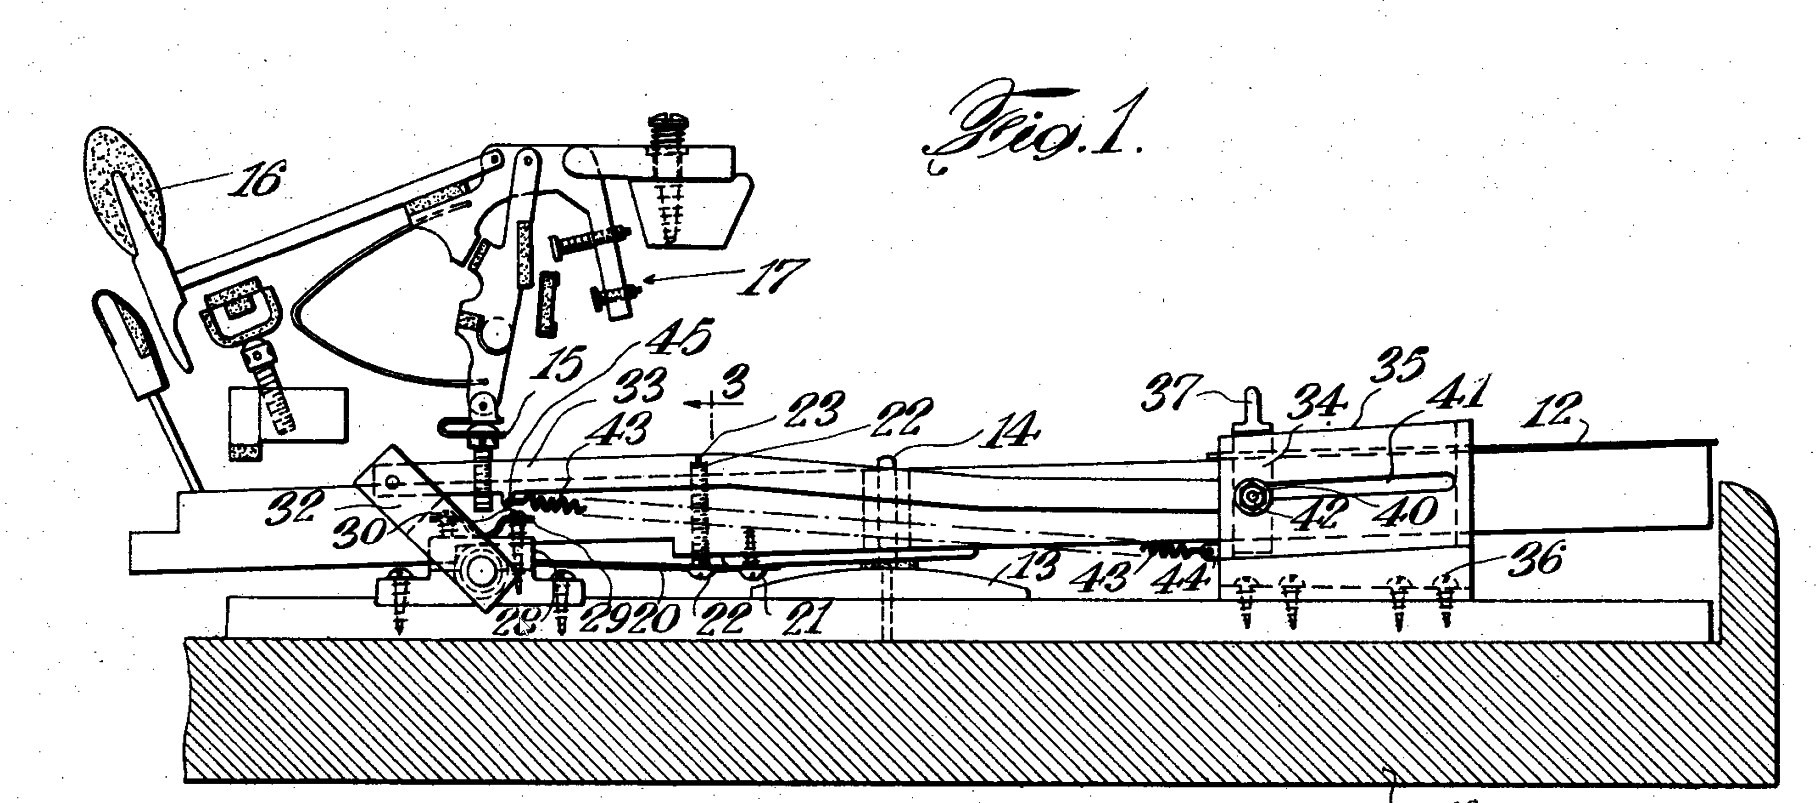
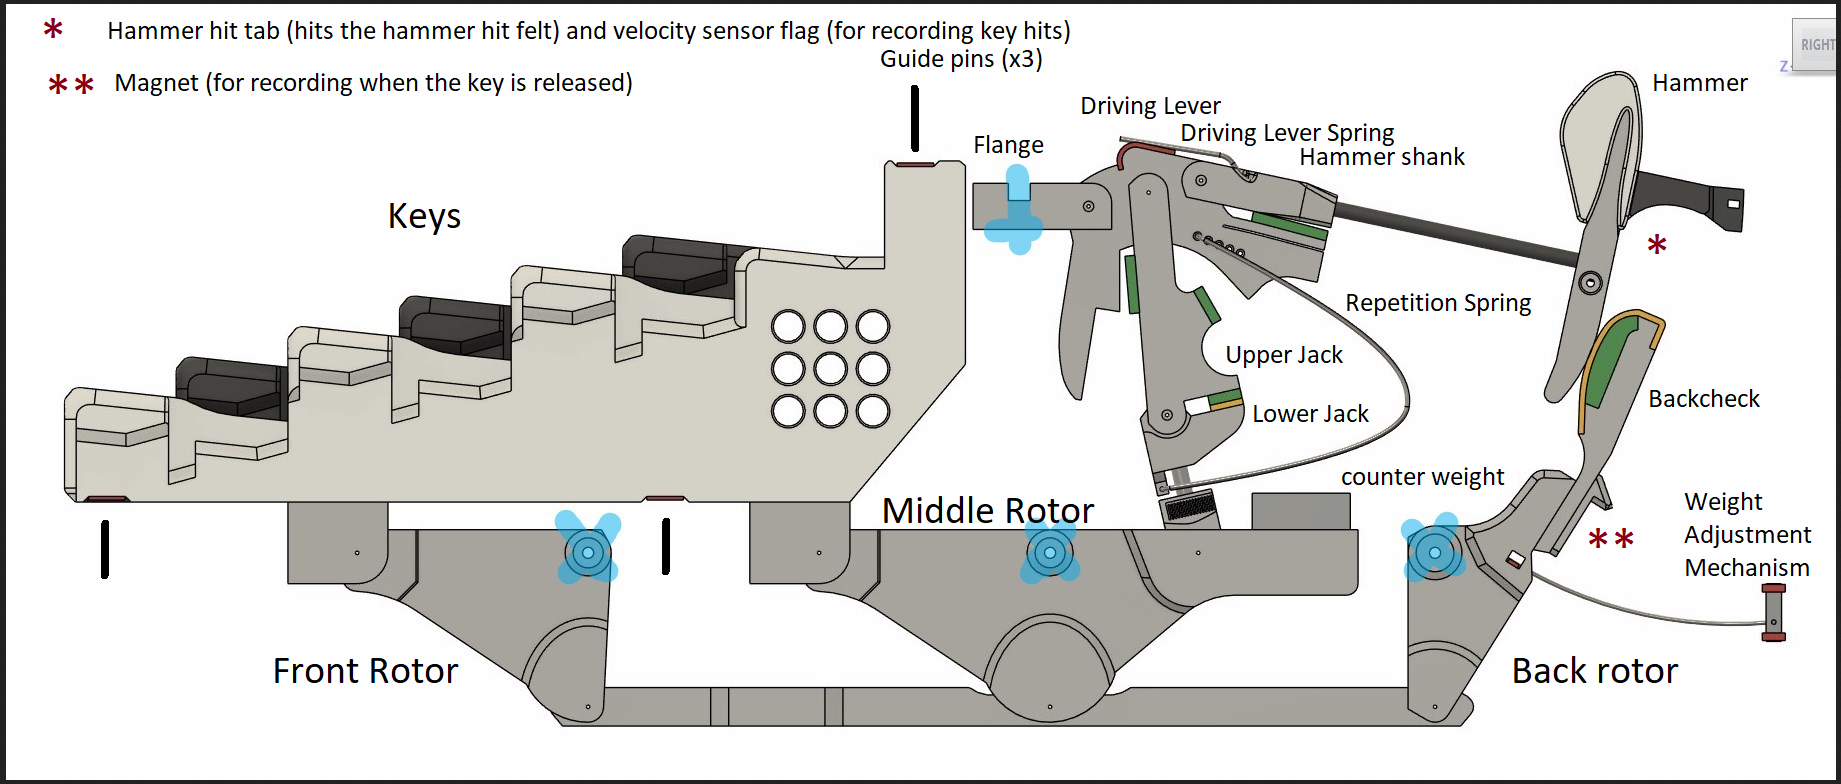
When compared to the Erard piano action, the hickman action is much simpler. For the letoff and repetition mechanism a setup similar to your own knee is used; when the key is in its rest position the two parts are aligned and force is transferred along the jack to the driving lever and to the hammer. When the letoff is triggered the two parts of the jack buckle which allows the hammer to drop down and be caught by the backcheck. Then due to the repetition spring when the key is released the hammer 'hovers' in place for a brief moment while the two parts of the jack align again, making it possible to play the next note without the key fully returning to its rest position.
I ended up getting the action capable of repeating the same note 12-14 times per second (speed wise - I can only play 3 successive notes at that speed by 'fanning' my ring, middle, and index fingers).
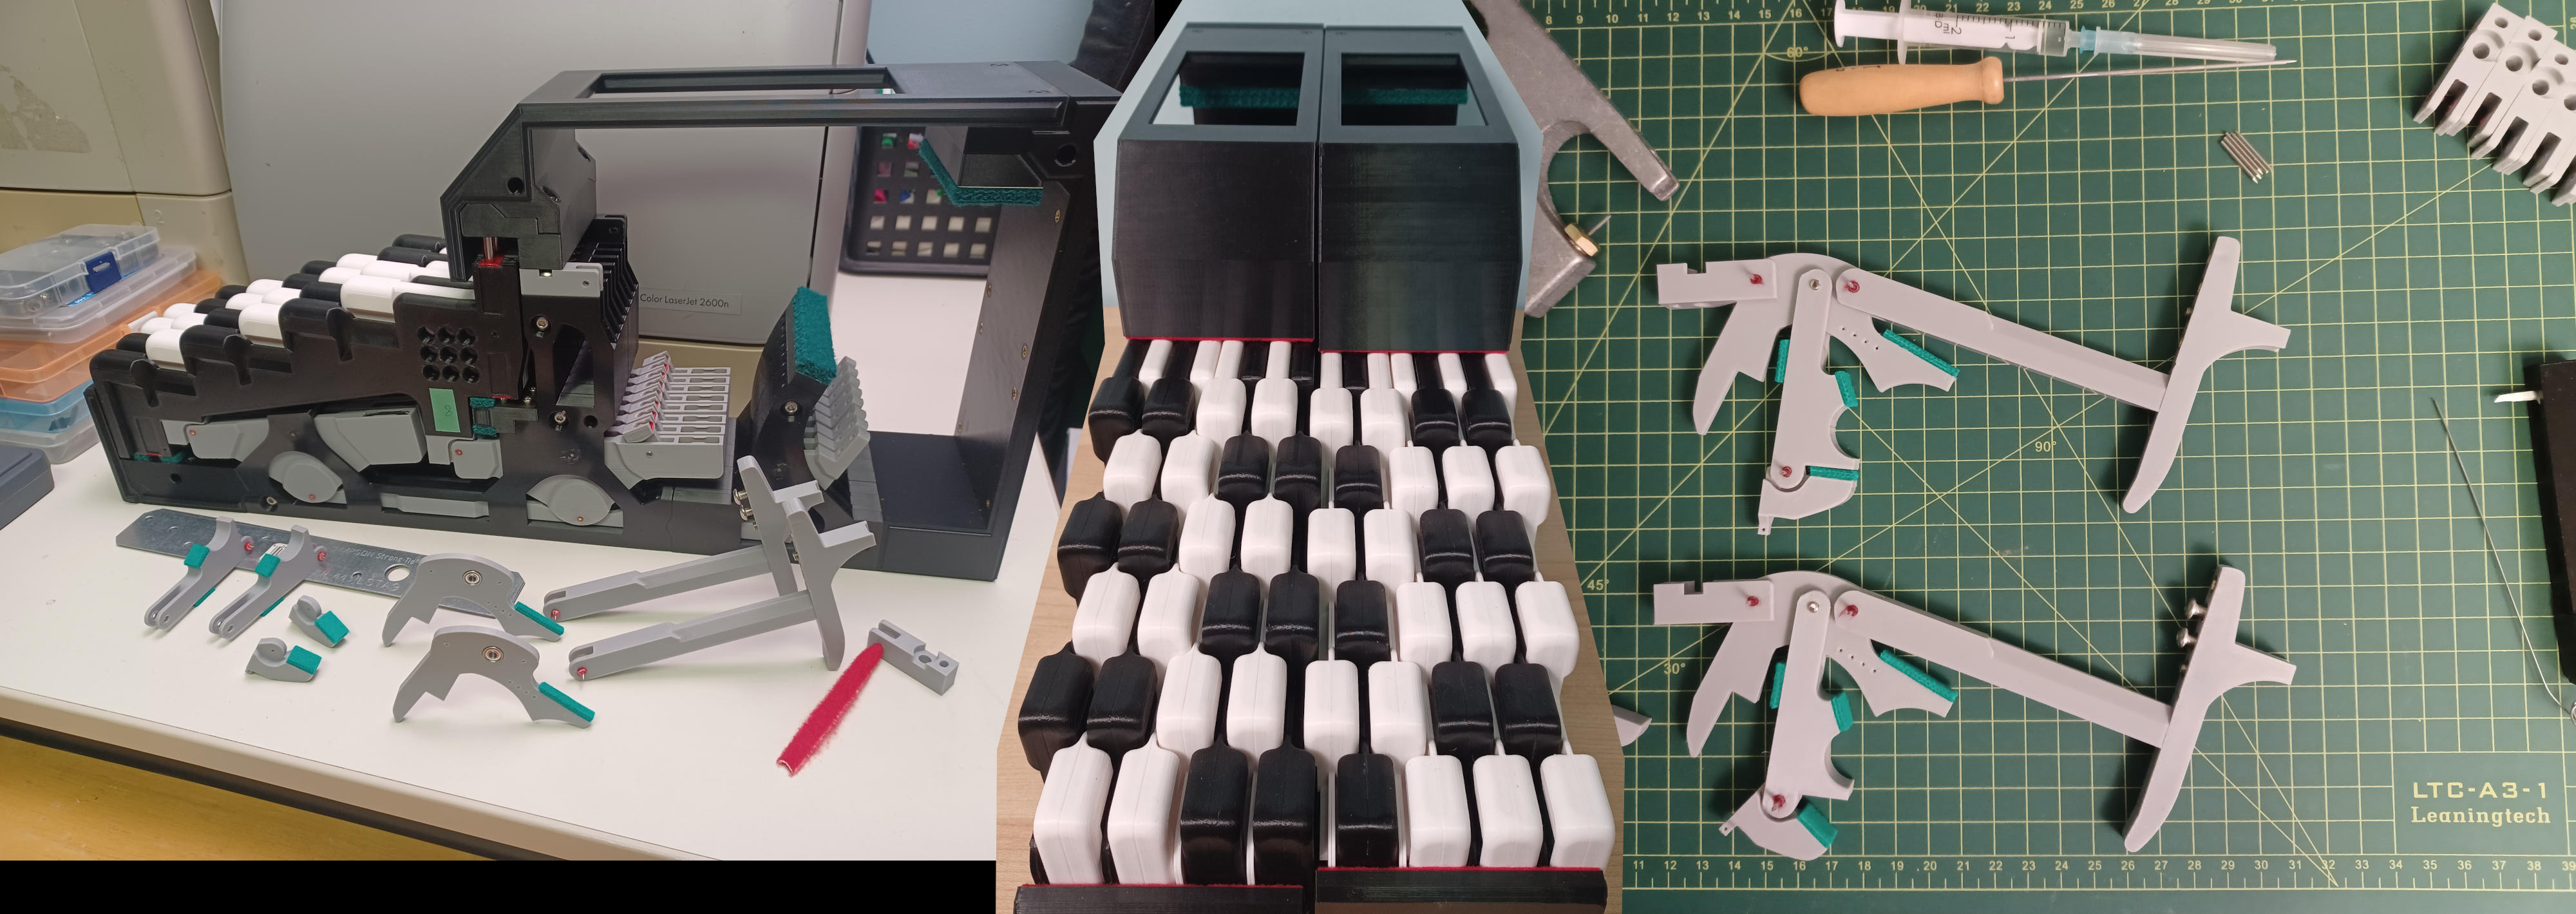
Two prototypes
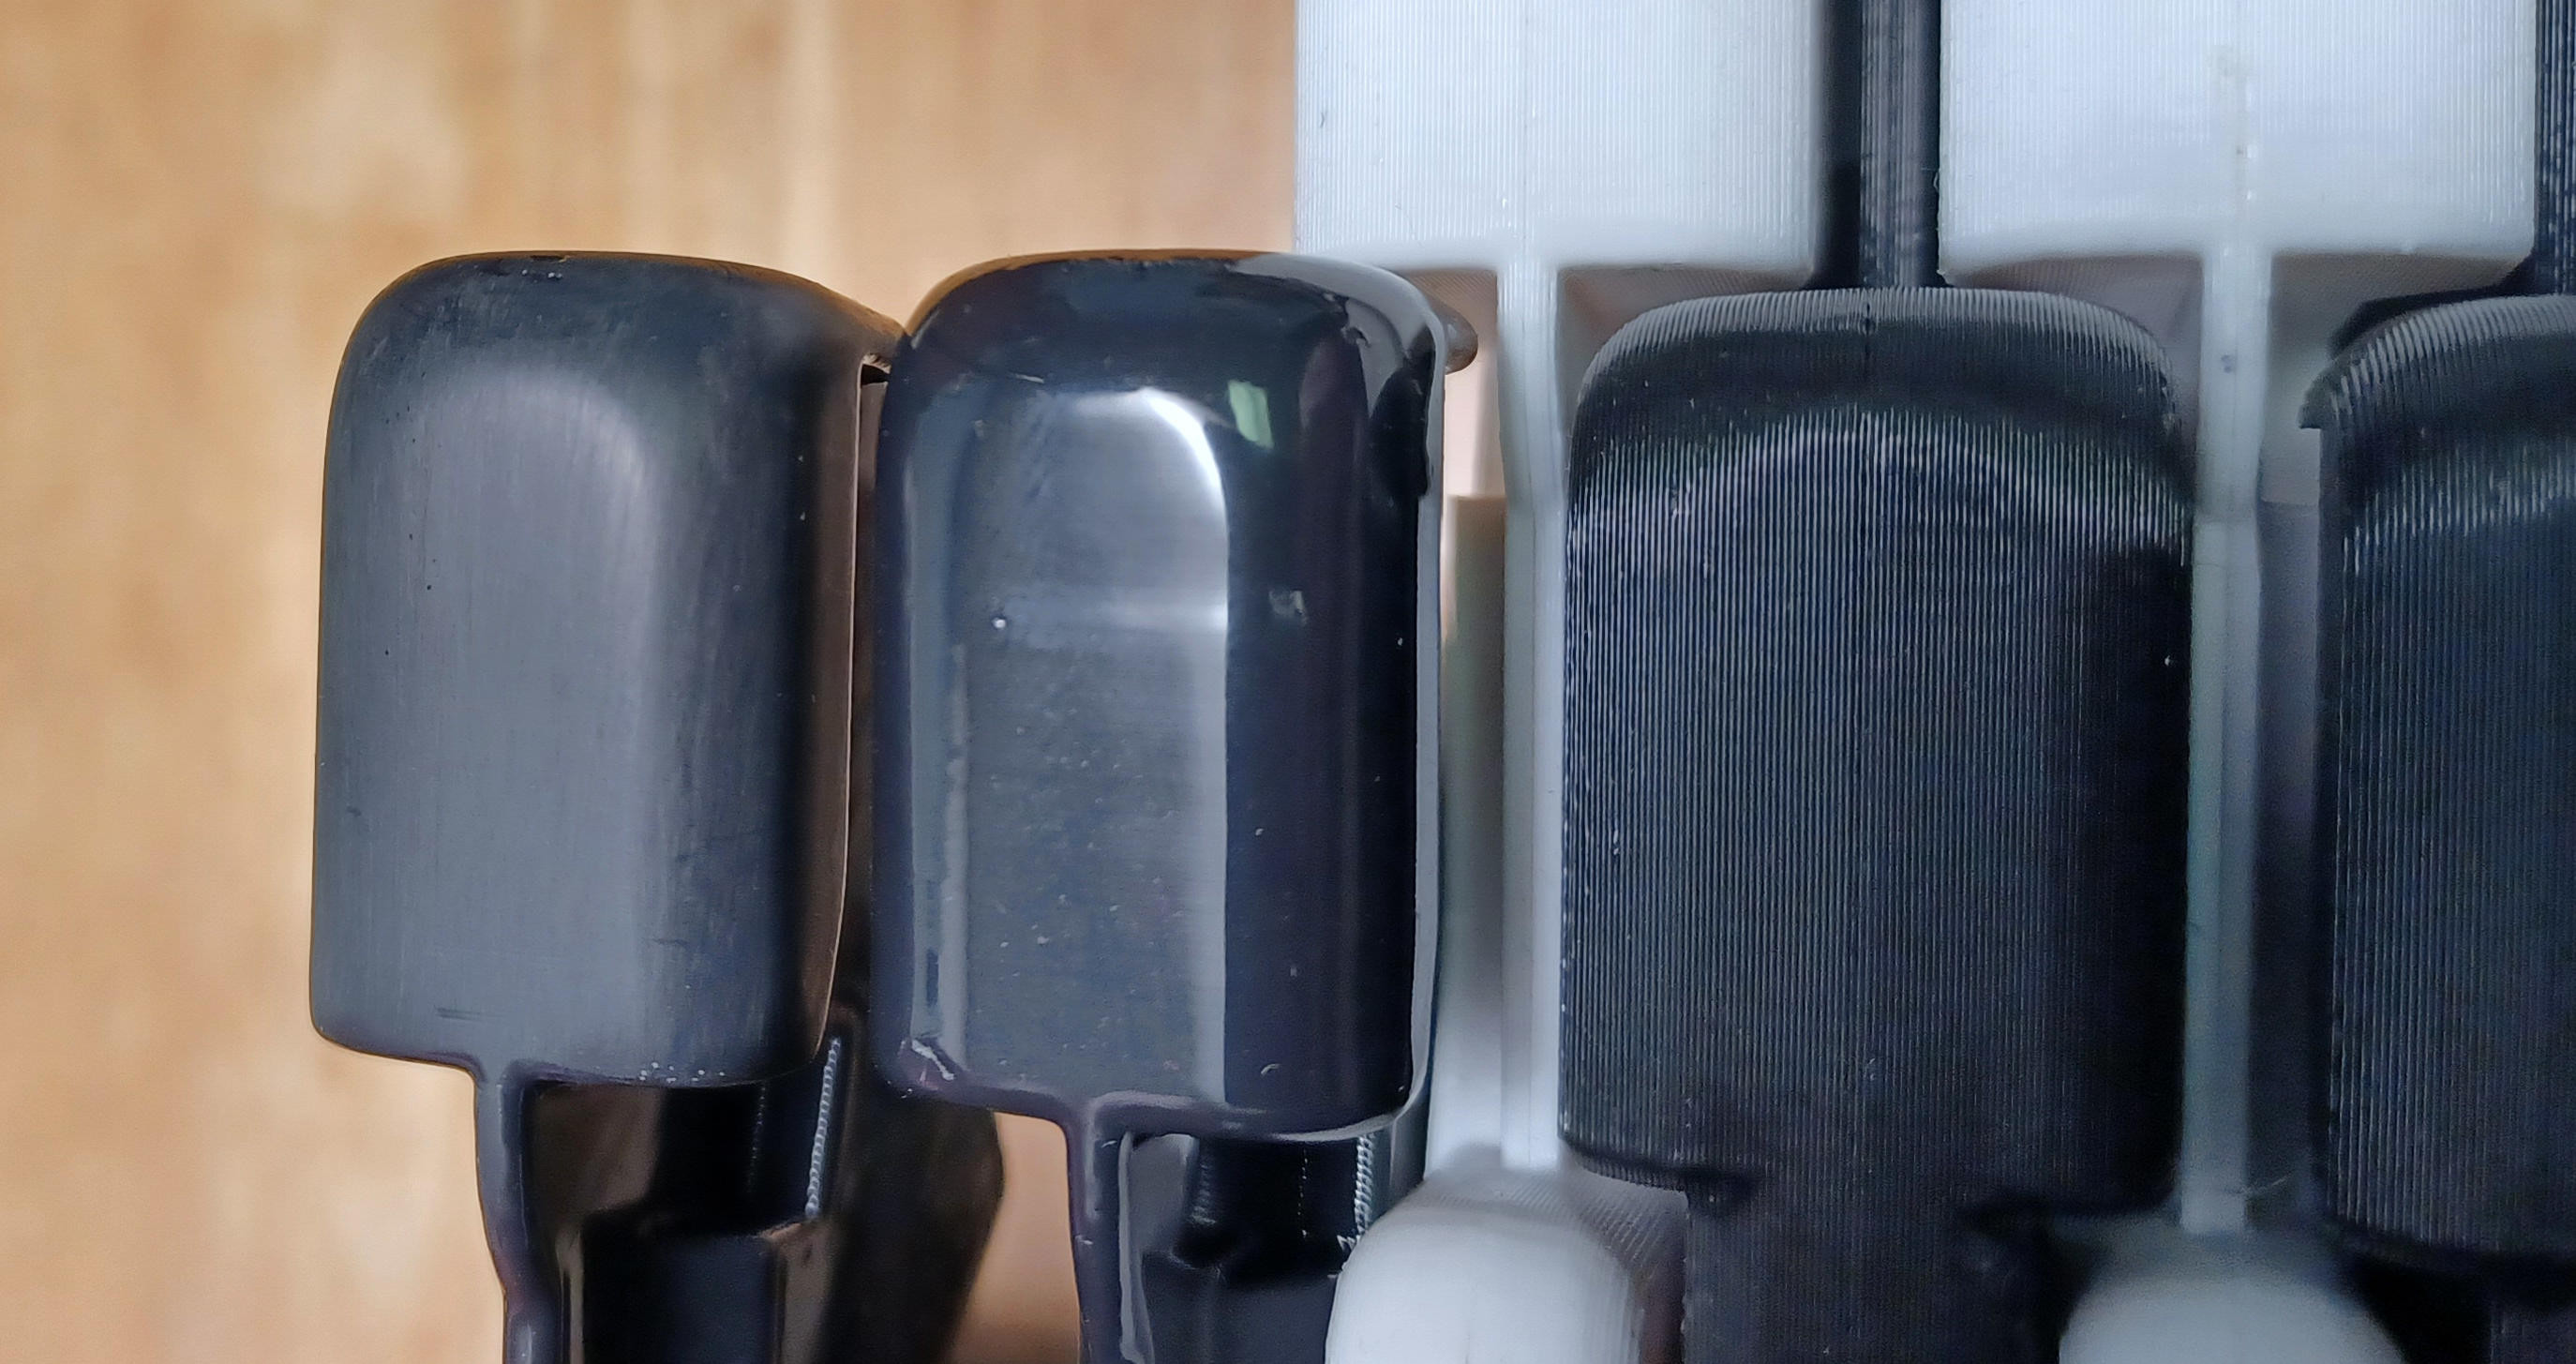
The top prototype is a newer version which I had to redesign almost from scratch after finding glaring issues with the initial (bottom) prototype that made the repetition not work well above 8 notes/sec. I made some further changes to the top prototype after this, but they were minor at best.
One important note for the new prototype is I incorporated a weight adjustment mechanism (lower left) which is essentially a spring pushing the key up that can be adjusted on a key-by-key basis (as a replacement for weight adjustment via lead plugs), and for the entire piano via a rotational shaft to give 30 to 90 g range of key down-weight.
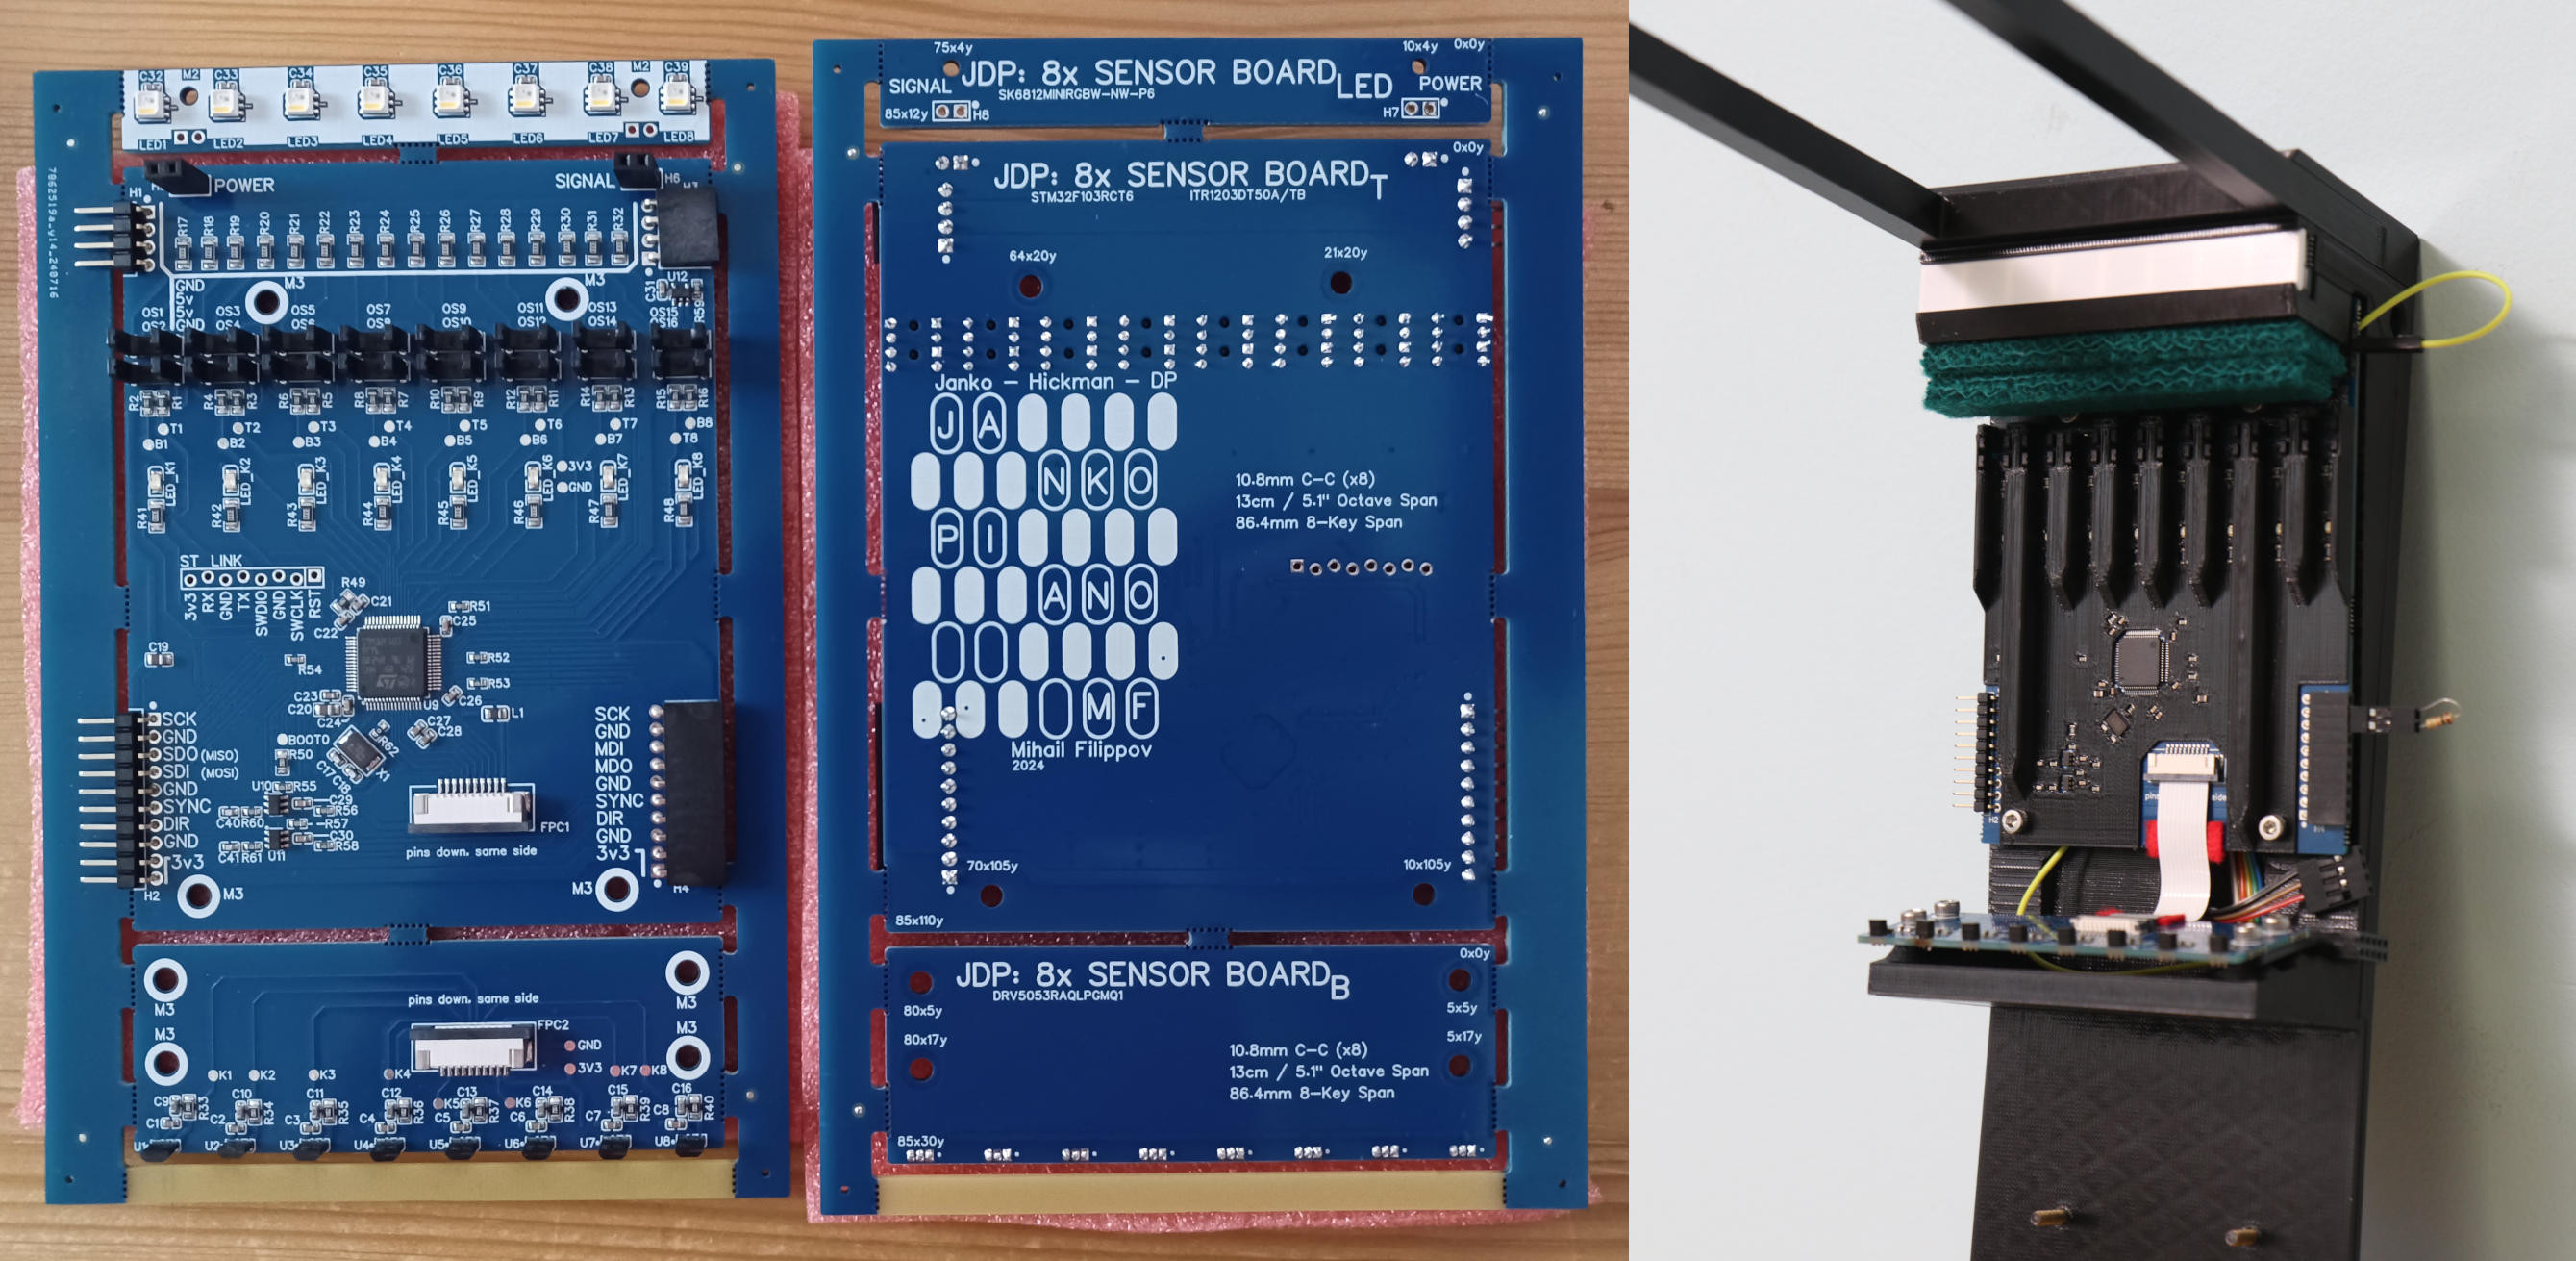
Sensor boards / Electronics
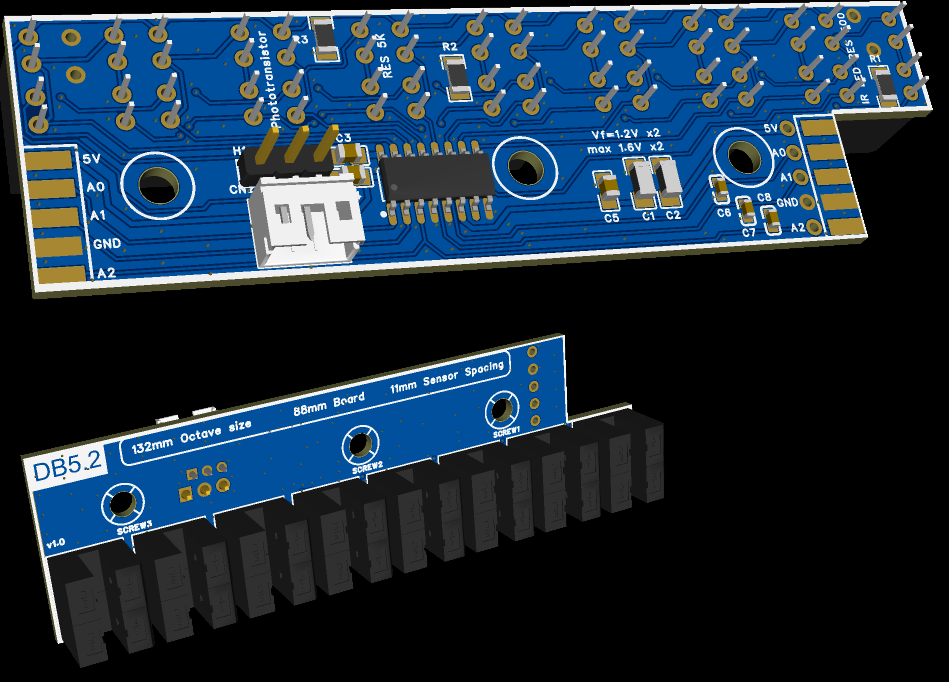
I went with easy EDA for the design of the schematic and PCB layout, mainly due to deciding right from the start that I want to order the boards made & populated without me having to learn to solder SMD components with 0.2mm pin spacing. This decision is also why I decided to go with each board having its own micro-controller, as they were quite cheap (1.20$ each) and allowed me to communicate / test each board separately via an SPI connection.
There are 16 optical slot sensors for measuring hammer velocity right at the end of its swing which should provide the best measurement for how loud the note should be played, and there are 8 hall effect sensors on the bottom (on a separate board) that are angled to read the movement of the backcheck rotor which I use to send key-off data. I originally planned to also send updates 10 times per second or so in terms of the real-time position of the keys, but apparently this information isnt used by any VST so…
Right - and at the very top (on yet another separate board) is a set of 8 LEDs similar to those found on LED strips. I figured since I am ordering the boards made anyway I might as well add in an LED strip to the piano that could light up when the notes are pressed, or alternatively act as a light metronome (though that function is far in the future).
Control unit
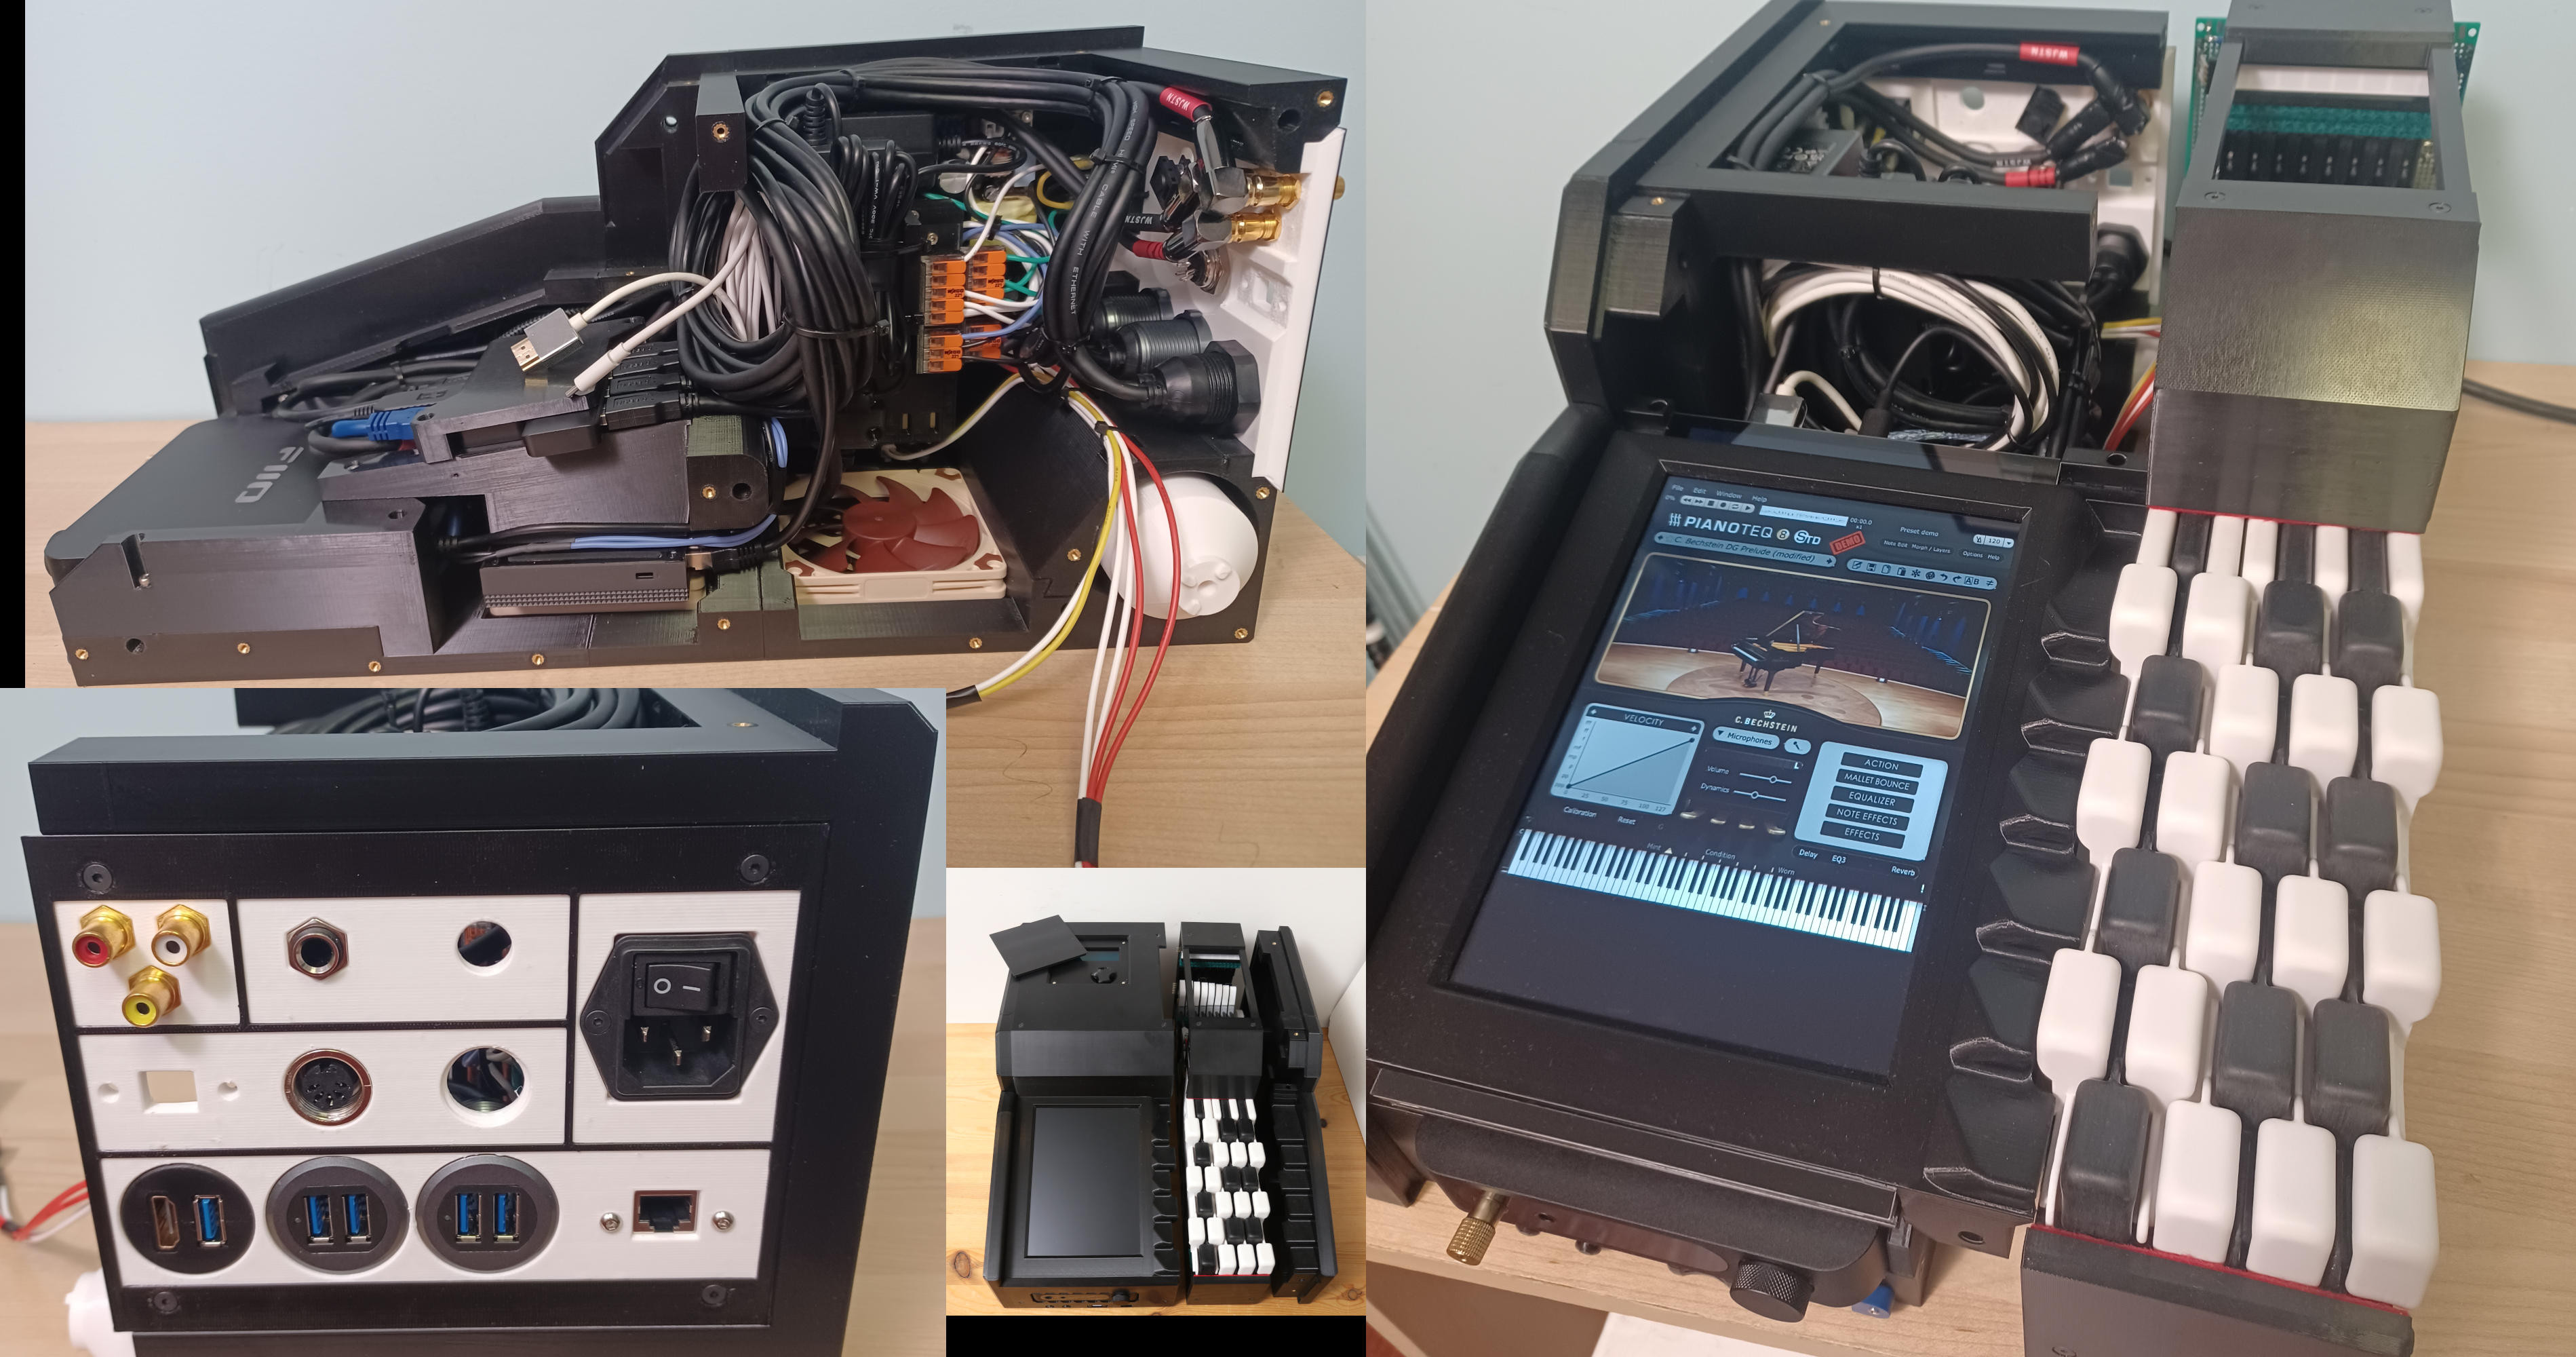
And finally I put together the control unit that will go to the left of the keyboard. I managed to fit in a mini-pc, 10 inch touch screen, DAC, and the power supplies for the 3.3v and 5v lines necessary for the sensor boards. At the moment I am outputting the MIDI data from the 8 key prototype via a MIDI cable into a MIDI to USB adapter that goes into the back of the control unit, but for the final version I will put together an integrated control unit that will go inside the piano.